Fix This First: Rookie Design Mistakes
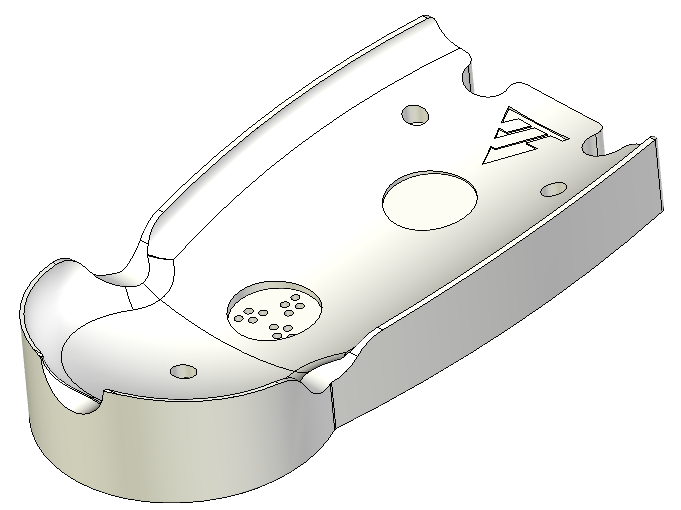
When I was fresh out of college, I was tasked by my past employer to design a charging dock for our new CNC handheld controller. Since I was green to the manufacturing industry and a very recent graduate, I knew little about design for manufacturing.
At the time, all I knew was that I had a beautiful design and I validated it with the help of 3D printing. Remember that in 2017, 3D printing was still evolving and not nearly as refined as it is now. The prints I received were okay, but not nearly the quality you would want associated with a million-dollar machine.
I decided to reach out to Best Tool for an estimate and Joe approached me with a tooling cost of $9,750. He also gave me some feedback about what the design was lacking and how to overcome those issues.
1. The rib wall thickness was too thick. Should be ⅔ of the overall thickness.
This is standard molding practice to avoid sink.
2. No draft anywhere.
Regardless of how exemplary your education may have been, the mistakes I made are very common amongst new designers. There are no straight walls in injection molding, because parts that are created using injection molding require draft to be ejected out of the tool.
When the mold opens, the part is exposed to the air and immediately begins to cool, and cooling causes shrinkage. If the walls of the part are straight, they will shrink and constrict around the metal that they were formed on. This makes it almost impossible for the machine to push the parts off as they will be hugging the metal as they’re ejected. If they have draft, they will immediately release from the metal as soon as they start being pushed off.
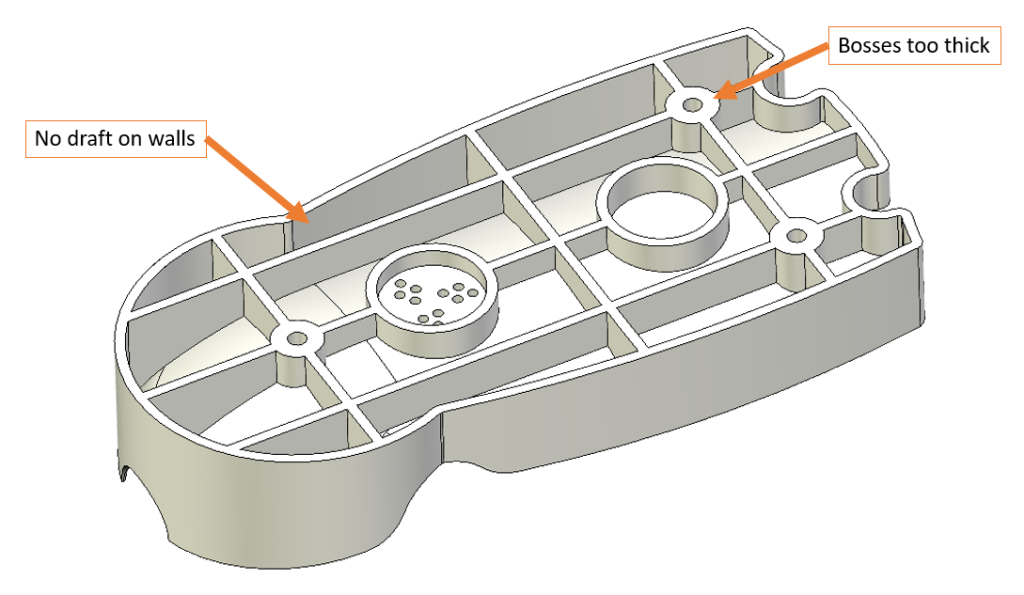
3. Boss thickness too thick.
When I initially came up with the design I thought it would be a good idea to add some additional support when these are fastened to the machine. My concern was that someone might reef on this and break it. Instead, Joe offered a better solution by recommending brass insert to take the torque.
4. 0.02 wall will not fill.
The original controller that I designed had magnets on the back, which stuck to the side of the machine. The lower magnet (lower circle in the cradle) was replaced with electrical contacts for charging. This left us with only one magnet to work with. The magnet strength was just okay, and getting a good feeling seat would require little distance between the magnet and the steel puck I planned to glue to the back of the controller.
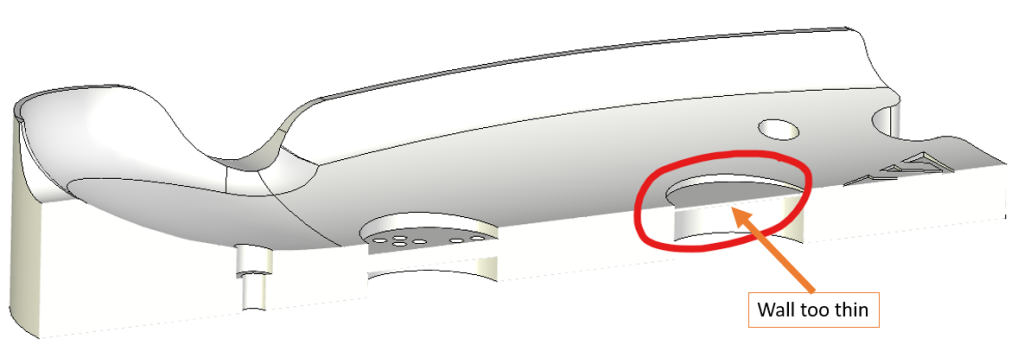
This could have been redesigned with a pocket from the front where a steel puck would be press fit in to achieve the same result.
Ultimately, for only needing 10-20 of these charging docks a year, my company chose to go another route.
-Isaac